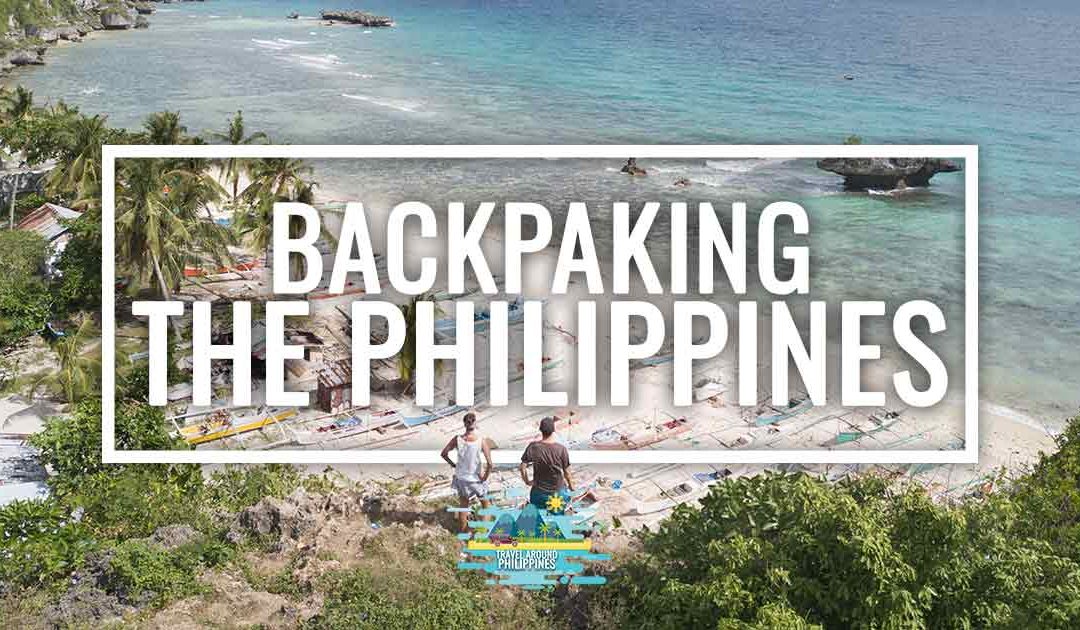
Is it possible to take a backpacking trip in the Philippines? Without the slightest doubt, yes. And we’d add that it’s one of the best countries for a trip like this.
But what is a backpacker? Although the dictionary only says that a backpacker is someone who carries a backpack, for us—who also count ourselves in this way of traveling, as we’ve spent more than 10 years roaming the world with a one-way ticket and a backpack—this is the one that differs from a fully organized trip. Backpackers like to travel independently, go with the flow a little, mix more with the people and places we visit and, although we sometimes treat ourselves (especially as the years go by and your back starts to ache), we try to keep costs down so we can stretch our backpacking days as much as possible.
For this reason, we’ve decided to give you the reasons to take a backpacking trip in the Philippines, suggest destinations that fit your way of traveling, and share lots of tips to help you prepare your next adventure. Keep reading and discover the most complete backpacker guide to the Philippines.
Is the Philippines a country for backpackers?
We already hinted at it above, but we have no doubt: the Philippines is a perfect country for backpackers. What leads us to this conclusion? Basically these:
- It’s a safe country for independent travel, without needing to use private transport or stay in resorts. In the Philippines, backpackers are welcome and you can move around with peace of mind. You can read more about this in Is it safe to travel to the Philippines?
- Backpacking the Philippines is affordable. While the value-for-money ratio is a bit lower than in other Southeast Asian countries, it’s totally possible to spend €20 a day or, if you set your mind to it, even less. We’ll tell you more about this later.
- You’ll have the chance to meet lots of people and immerse yourself a little in the culture. We don’t know if it’s the climate or the Spanish heritage, but there’s a certain something in the Philippines that makes you open up more to people. This applies both to other backpackers out there (we should know—we met each other backpacking around the Philippines) and to Filipinos themselves, who are open people and, in addition, many of them speak English, which makes communication much easier.
- It’s a country that has become trendy among backpackers, so besides mingling with Filipinos, you’ll meet lots of people like you.
- There are remote, less-touristy destinations. In our opinion, backpackers like to get a little lost and step off the typical routes. When you want to socialize, you can head to any more commercial place and you’re sure to meet other travelers, but the Philippines also gives you the chance to “go a bit wild” and feel like you’re making your own discoveries.
- It lets you travel a little on the fly, without needing to have everything locked in. If, as we suggest, you’re not too short on time and you devote enough days, leaving room for improvisation will reward you with great experiences.
- And, practically speaking, since it’s a warm destination, you won’t need to pack so much winter clothing, so you can shoulder your backpack like a true backpacker in the Philippines.

Camiguin
Backpacker destinations in the Philippines
Okay, now you’ve got powerful reasons to consider a backpacking trip to the Philippines, but here comes the most important part: deciding where to go.
To be honest, we can’t think of places in the Philippines that aren’t for backpackers. Even the most touristy spots with top-tier resorts, like Boracay, can be enjoyed while backpacking. Plus, this also depends a lot on each person’s tastes and what they have in mind when they picture backpacking in the Philippines. To make it easy, we could sum it up like this:
- Epic beaches: Boracay, Malapascua, Bantayan, Romblon and El Nido.
- Island hopping: El Nido, Coron, Siargao and Camiguin.
- Multi-day island expeditions: tour from Coron to El Nido, Balabac and Dinagat.
- Hiking: Banaue/Batad, Sagada, Camiguin and Sibuyan.
- Snorkeling: Apo Island, Balicasag, Moalboal and Coron.
- Diving: Malapascua, Siquijor, Bohol, Moalboal, Coron and Apo Reef.
- Surfing: La Unión, Siargao, Catanduanes and Baler.
- Waterfalls: Bohol, Cebu/Moalboal and Siquijor.
- Motorbike road trips: Siargao, Siquijor, Bohol, Camiguin and Romblon.
- Sandbars: Cresta de Gallo, Romblon, Kalanggaman, Camiguin and Coron.
- Culture: Manila, Banaue, Cebu and Vigan.
- Less-touristy places: Concepción (Busuanga), Sibuyan, Tablas, Negros, Leyte, Caramoan, Dinagat, Masbate, Bicol, Cuatro Islas, Panay…
- Places with a strong backpacker vibe: Siargao, Malapascua, El Nido, Moalboal and Siquijor.
You can find tons of information about almost all of them in our island guides, as well as great summaries here: Best islands to visit in the Philippines, Things to do in the Philippines, Best beaches in the Philippines, Island hopping in the Philippines, Best waterfalls in the Philippines, Diving in the Philippines, Best places to snorkel in the Philippines, Volcanoes of the Philippines, Surfing in the Philippines or 11 less-touristy islands in the Philippines.
Cool experiences for backpackers in the Philippines
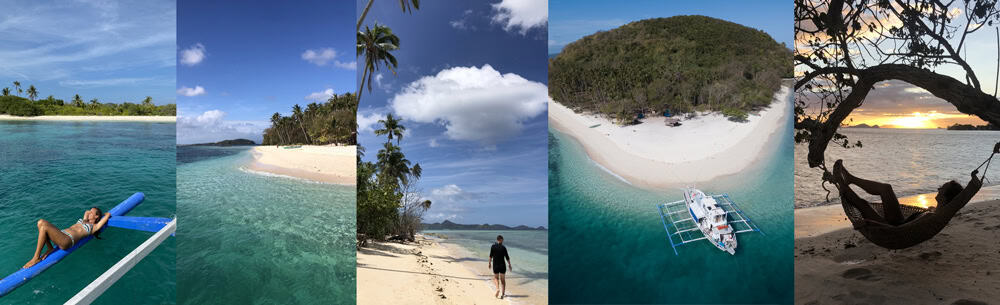
As you can see, you won’t be short of incredible islands for your backpacking trip in the Philippines. Here are some experiences we think fit your way of traveling:
- Climb Hibok-Hibok: few travelers make it to the top of this active volcano on Camiguin and enjoy the wonderful views.
- Swim with the whale shark in Pintuyan: barely known, here you can swim with the largest fish in the world roughly from September to April.
- Enjoy the secluded waterfalls of Bohol: although it’s an island with places as touristy as the Chocolate Hills (which, by the way, you can also climb on your own), Bohol has loads of cool waterfalls.
- Expedition from Coron to El Nido: imagine 3 or 4 days sailing the sea on a small boat and sleeping on uninhabited islands. A-MA-Z-ING.
- Dive with thresher sharks in Malapascua: it’s one of the few places in the world where you can see this wonderful shark.
- Go surfing in Siargao: whether you’re an expert or you’ve never tried it, this is a backpacker’s paradise in the Philippines.
- Make it to Cresta de Gallo: it’s not easy to get to, but the reward is huge. This is one of our favorite islands in the country.
- Sleep on Kalanggaman and explore it solo: 2 hours by boat from Malapascua, this spectacular island with a sandbar over 750 meters long will feel even grander once everyone leaves and you have it all to yourself.
- Swim alongside turtles on Apo Island: it’s one of the coolest places to see them in the wild. Plus, if you stay overnight, you’ll be able to enjoy it even more.
Of course, this is just a small selection. The Philippines is so endless that we never tire of coming back.

Backpacking routes in the Philippines
As we explain in How many days to travel to the Philippines?, we suggest you don’t devote fewer than 20 days to this backpacking trip around the Philippines. This is particularly important if you want to make the most of it, if you plan to go beyond the purely touristy, and if you want to move around a lot by public transport.
Keep in mind that it gets dark at 18:00 and that transport can be so time-consuming that you can easily spend a day (or more) changing destinations even within the same region. So two of the most frequent and biggest mistakes are: giving it too little time and trying to do a destination marathon. The archipelago is a place best enjoyed calmly—really, seeing more islands won’t make you like it more.
Here are some 20-day routes (not counting the day you leave or the day you return) that we think are perfect for backpacking the Philippines:
All-out Palawan + Malapascua
Day 1: Spain/Latin America – Philippines
Days 2, 3, 4 and 5: Coron
Day 6: boat Coron – El Nido
Days 7, 8, 9 and 10: El Nido
Day 11: van from El Nido to Port Barton
Days 12, 13 and 14: Port Barton
Day 15: van to Puerto Princesa, flight to Cebu, bus to Maya and boat to Malapascua
Days 16, 17 and 18: Malapascua
Day 19: return from Malapascua to Cebu in the afternoon
Day 20: end of trip
Of course, this allows for lots of tweaks. You could slot in the Coron–El Nido expedition or swap Malapascua for many other destinations such as Bohol, Siargao or Camiguin.
I’m here to dive!
Day 1: Spain/Latin America – Philippines
Day 2: flight to Camiguin
Days 3, 4 and 5: Camiguin
Day 6: boat from Camiguin to Bohol
Days 7, 8, 9 and 10: Bohol
Day 11: boat from Bohol to Siquijor
Days 12, 13, 14 and 15: Siquijor with excursion to Apo Island
Day 16: transfer from Siquijor to Moalboal
Days 17 and 18: Moalboal
Day 19: bus from Moalboal to Cebu
Day 20: return home
Another option would be to swap Siquijor for Malapascua or Coron. To do this, go back to Cebu and from there you can fly to Coron or take a bus to Malapascua.
Check out these diving trips in the Philippines.
Philippines’ greatest hits
Day 1: Spain/Latin America – Philippines
Days 2, 3 and 4: Port Barton
Day 5: transfer from Port Barton to El Nido
Days 6, 7, 8 and 9: El Nido
Day 10: flight from El Nido to Bohol
Days 11, 12, 13 and 14: Bohol
Day 15: transfer from Bohol to Siargao via Cebu
Days 16, 17 and 18: Siargao
Day 19: flight from Siargao to Cebu or Manila
Day 20: return home
I’ll skip the well-known—I want to get lost
Day 1: Spain/Latin America – Philippines
Day 2: boat from Manila to Sibuyan
Days 3, 4 and 5: Sibuyan and Cresta de Gallo
Day 6: boat from Sibuyan to Romblon
Days 7, 8 and 9: Romblon
Day 10: transfer from Romblon to Sablayan (Apo Reef)
Days 11 and 12: Pandan Island/Apo Reef
Day 13: boat from San Jose (Mindoro) to Coron and van to Concepcion
Days 14, 15 and 16: Concepcion (Busuanga)
Days 17 and 18: Coron
Day 19: flight to Cebu or Manila
Day 20: return home
You can find routes for more and less time in Philippines travel itineraries.
If you’re not yet ready to travel solo and you’re short on time, this backpacker-style tour we found on Civitatis looks great:
10-day backpacker group tour in Palawan
The perfect time to go backpacking in the Philippines
If you’re after low prices and fewer people in the places you want to visit, we’re clear about it and recommend the months of January, February and March for backpacking in the Philippines. At this time it’s the dry season across much of the country, there aren’t as many people and, therefore, prices are a bit lower than at Christmas, Holy Week and during the work and school holidays in the Philippines, which are in April and May.
Other great months are October and November. While it’s true there’s a higher risk of typhoons or storms, it doesn’t mean it rains all the time, and it’s a period with little tourism.
If you only have holidays in the European summer, don’t worry—you’ll still be able to take a great backpacking trip to the Philippines. We just recommend trying to come for longer so you have more flexibility to avoid any bad weather. In Travel to the Philippines in July, Travel to the Philippines in August and Travel to the Philippines in September we break it all down for you.
You can read more in Best time to travel to the Philippines.

Malcapuya Island (Escapade Tour in Coron)
Getting to the Philippines
Unless you’re taking the unusual ferry route between Borneo and Mindanao, the best way to reach the country is by plane.
As in 99% of cases, it’s much cheaper to book flights well in advance, and the price will also depend on when you plan to take your backpacking trip to the Philippines. It’s normal for prices to be higher in July–August–September, at Christmas and during Holy Week.
On the other hand, there are no direct flights to the Philippines from Spain or South America. You’ll need to connect in other European or Asian countries. So plan on about 18–30 hours to set foot on Asian soil.
How to get around
The possibilities for enjoying that backpacking route you’ve got in mind around the Philippines are endless. You have loads of transport options at your disposal. Which you choose will depend on your budget and how much time you have.
Our advice is to avoid trying to cover long distances, since the transport infrastructure isn’t the best. This way, you’ll enjoy the trip much more without having to spend hours and hours on a bus or a boat. Even so, these experiences are also part of a backpacking trip in the Philippines and thanks to them you’ll meet people and enjoy the archipelago’s wonderful landscapes.
In short, you can choose between:
- Planes: there are several airlines offering domestic flights at fairly affordable prices. The cheapest are usually Cebu Pacific Air and AirAsia, considered low-cost. In 1 or 2 hours you can be from one island to another. The thing is, not all islands have airports, so it’s an option that sometimes can’t be considered. We explain everything in Airlines in the Philippines.
- Buses and vans: the most backpacker-friendly option in the Philippines for covering long distances. Even so, there are few possibilities for overnight routes like in other countries in the region. Here you have to forget about sleeper buses like, for example, you have in Vietnam.
- Boats: being an island country, you’ll surely have to take a few. They’re an affordable alternative for both short and long journeys. In the latter case, it’s common for them to have beds, so you can save a bit on accommodation. Note that there are also fast boats (barcos rápidos), which aren’t very cheap.
- Jeepneys and multicabs: the former are a symbol of the Philippines. This kind of bus will help you move cheaply within big cities and for relatively short routes around the islands. The latter are the more modern and slightly smaller option than the jeepney.
- Tricycles: this kind of motorcycle with a sidecar also serves as public transport and can run fixed “line” routes in cities and on islands. Of course, you can also hire one privately, though it’s more expensive.
- Taxis and GRAB: a good alternative for backpackers in the Philippines—especially if there are several of you—for large cities.
- Motorbike: a great option so you don’t have to depend on anyone and can move at your own pace. Daily rental prices range between 250 and 500 pesos (5–10€). As you can imagine, the more days you rent, the cheaper it will be. Of course, make sure you have a license to ride one and know how to do so. In Renting and driving a motorbike in the Philippines we tell you everything.
You’ll find much more information in How to get around the Philippines.

Is hitchhiking possible in the Philippines?
It’s allowed; another matter is that hitchhiking in the Philippines isn’t very common and Filipinos see it as something unusual. To be honest, the times we’ve done it, in 75% of cases we were picked up by foreigners living in the country. Most Filipinos were amazed that we were trying and even laughed to see us standing there giving it a go.
Therefore, based on our experience, if you want to try it, arm yourself with patience or stick to short stretches where you know there’s plenty of transport.
Where to sleep on a backpacker budget
Backpackers in the Philippines have multiple accommodation options. In recent years a lot of hostels for backpackers have sprung up and many properties have also added dorms as an alternative for travelers who are going solo or simply want to save money.
On the other hand, in the Philippines you’ll also have the option to stay in simple guesthouses for €10–15 a night—or even less—where you’ll often have a closer relationship with the owners, who are usually families.
Here are some backpacker-friendly accommodation recommendations in the Philippines in the main tourist destinations:
| Destination | Backpacker accommodation | Why stay here? |
| El Nido | Frendz Hostel El Nido | Right in the center and with an infinity pool on the rooftop, it’s a convenient place to explore El Nido and socialize |
| Coron | Hop Hostel | The best in the area, with a pool and a rooftop boasting the most epic views of Coron |
| Port Barton | Russel Place | This hostel run by a lovely Filipino family has private rooms and dorms very close to the bus station and all Port Barton’s attractions |
| Puerto Princesa | Guni Guni Hostel | Newly built hostel ideal for a short stop in the city. Spacious dorms, air-conditioned and very clean |
| Manila | Lub-D Philippines Makati | Located in the trendy Poblacion area, it not only has spotless rooms but is super modern, and from here you can easily reach Intramuros by boat |
| Bohol | UNK’s House Homestay | Located in a quiet area of Panglao, it’s a family-run hostel perfect for those who don’t want to spend much and want to avoid the crowds |
| Siquijor | Tagbalayon Lodging House | Very close to the beautiful beaches of San Juan, this is a family-run hostel with all amenities |
| Siargao | Sunlit Hostel | With a pool and a very pleasant vibe—without being a full-on party hostel. Great location |
| Boracay | Frendz Hostel Boracay | There aren’t many hostels in Boracay, so if you miss the backpacker atmosphere, this is your spot. With a pool |
| Malapascua | Malapascua Budget Inn | Located right in the island’s “hub”, you’re two steps from the beaches and the market, with plenty of backpacker-friendly food options |
| Banaue | Banaue Homestay | Among the humble guesthouses in Batad, this one is very family-run and affordable |
| Bantayan | Casa Isabel Hostel | You’ll notice Bantayan doesn’t have much of a backpacker crowd, but almost everyone gathers at this hostel in Santa Fe |
| Cebu | Balai Balai Capsule Hotel | Located right in the center of Cebu and two steps from the port, a capsule hostel where you’ve got all the comforts |
You can find many more recommendations in our article Best hostels in the Philippines. Plus, in every guide on our website we have an article dedicated to accommodation, where you’ll always find backpacker options in the Philippines. We’ve also created some specific ones for backpacker stays like Hostels in Manila, Hostels in Bohol, Hostels in Siargao or Hostels in El Nido.
How do you find these places? Do you need to book them? Well, as we explain in Hotels in the Philippines, we always encourage you to use platforms like Booking or Agoda. As for whether it’s necessary to book or not, it depends a lot on the dates you’re traveling. You’ll rarely find cheaper prices on the spot, since in the Philippines there’s often the odd case that it’s cheaper to book online (we’ve had to book on our phone at the reception itself…), especially if you’re traveling in peak-demand periods. If you’re heading to more rural areas where accommodation is scarce, there are often small guesthouses that don’t appear online, so you’ll need to book those on the fly.
You can also use other alternatives like Couchsurfing, which works well for backpackers in the Philippines, especially in large cities like Manila, Cebu or Puerto Princesa.

Can you camp in the Philippines?
As for wild camping, we don’t know whether there is any regulation on camping in the Philippines, but we can tell you that we’ve seen lots of people traveling with their tent. What happens in the Philippines is that there is a lot of private property; there are even beaches that are private or that the owners of the adjoining land consider private. Therefore, we recommend that you ask before camping whether you can do it, especially in tourist areas. If it isn’t possible, we’re sure some plot of land or even a hotel will let you do it in their area. You might have to pay a small amount.
In many island hopping tours you also have the option to do what’s known as an overnight, that is, spend the night on a deserted island. In most of these cases, you usually sleep on privately owned islands, so they also charge a few pesos to pitch your tent or, if you don’t bring one, they’ll even rent you one.
Travel insurance for backpackers in the Philippines
If you don’t want to risk blowing your budget in case something happens, we strongly recommend traveling with good travel insurance. We say this from our own experience, as we had the “good fortune” of having a bill for 22.000€ in our hands at a hospital in Manila due to complications from pneumonia.
We’ve been traveling with IATI Seguros for more than 10 years, and they also have a special policy for backpackers. IATI Mochilero is designed for those of us who enjoy a bit of adventure and, therefore, goes further than others by covering activities such as snorkeling, canyoning or diving, among others. You can read more about our experience in Travel insurance for the Philippines and IATI Seguros reviews. In addition, here’s a 5% discount for your policy.

Backpacker meals in the Philippines
If you’re a backpacker, you’re surely eager to dive deep into Filipino culture, and part of it lives in its cuisine. Although it doesn’t have the exoticism of Vietnamese or Thai food, we encourage you to give it a chance and stop by the carinderias to eat every day. These are the country’s typical eateries, where there are usually lots of pots so you can choose which stew to have with your rice. Eating in these places costs 2€ or 3€, and you can also have breakfast.
You’ll also find loads of little stalls with all kinds of snacks and even convenience stores, called sari-sari, where you can buy something to nibble on. It would be a sin to take a backpacking trip to the Philippines and not try these dishes:
- Adobo: a kind of stew, usually meat, with soy sauce and vinegar.
- Tortang talong: a delicious eggplant omelette.
- Kinilaw: Filipino ceviche.
- Lumpia: a very tasty fried spring roll that’s usually filled with vegetables.
- Pancit canton: stir-fried noodles with vegetables and sometimes meat.
- Halo-halo: a wild mix of sweet things that’s the flagship of Filipino desserts.
As for drinks, to save plastic and money, we strongly recommend taking a stainless steel bottle like this one. You’ll find lots of drinking-water stations (many of them free or for a few pesos) that you can drink from safely. Many restaurants also serve this water in jugs, which is totally safe.
You can find much more on this topic in our article What to eat in the Philippines? 25 typical dishes and drinks.

How much you’re going to spend
While not all backpackers are looking for low cost, we do try to save so we can stretch our backpacking days as much as possible. We’ve already hinted at it above, but the Philippines is a backpacker’s paradise, as it has quite affordable prices. To give you an idea:
- Full meal in a carenderia: 120 Philippine pesos (2€)
- Beer in a bar: 80–100 pesos (1,50€)
- Motorbike rental for 1 day: 350 pesos (6€)
- Ferry from Cebu to Bohol: 800 pesos (12€)
- Bed in a “posh” hostel in El Nido: 1.000 pesos (15€)
- Double room in Siquijor in a budget place: 900 pesos (14€)
- Island hopping in El Nido: 1.200 pesos (20€)
- Dive in Balicasag: 2.000 pesos (30€)
- Bus ticket from Cebu to Maya to go to Malapascua: 250 pesos (3,70€)
You can check the Philippine peso exchange rate on Xe.com.
Although it’s impossible to give you an exact figure—since this depends on how many days you’ll be staying, the destinations you visit (some places are more expensive than others), the time of year, and the activities you do (it’s not the same to come to the Philippines to do a lot of diving or island hopping as it is to stick to beaches or hiking), plus the type of accommodation and restaurants you choose—we can summarize backpacker expenses in the Philippines like this:
| Backpacker expenses in the Philippines | Very low cost backpacker | Balanced backpacker | ‘Comfort’ backpacker |
| Accommodation | 5–7€ | 8–15€ | +25€ |
| Food | 4–8€ | 9–15€ | +20€ |
| Transport | 2–8€ | 9–15€ | +20€ |
| Activities | 0–15€ | 12–20€ | +30€ |
| Extras | 1–3€ | 3–5€ | +6€ |
| Daily total | 12–41€ | 39–70€ | +101€ |
| Total for 20 days | 240–820€ | 780–1.400€ | +2.020€ |
To these costs you should add the price of the international flight (if you’re coming from Spain, between 700 and 900€ round trip) and travel insurance (essential).
You can read much more in Budget for the Philippines.
How to handle money?
You now more or less know what you’re going to spend, but how do you handle payments? The first thing you need to know is that cash is king. The second is that, with the exception of a couple of ATMs, they all charge a fee of around 250 pesos (about 5–6€). Therefore, our tips are:
- Bring some cash from your country and exchange it at a bureau de change or at Manila airport, where, surprisingly, they offer some of the best exchange rates in the country. An amount around 300€–400€ for 2–3 weeks can be fine. We always carry the money on us and have never had a problem. You’ll find many recommendations on this topic in Money in the Philippines.
- Use Remitly to withdraw cash. Seriously, it’s what we constantly do and it saves us an incredible amount in fees each year. It sounds odd at first, we know, but it works wonderfully. Everything is explained in Remitly for the Philippines, where you also get 10€ as a gift.
- Take a couple of debit/credit cards that minimize those fees as much as possible for the few payments you’ll be able to make by card, to book online or, as a last resort, to withdraw cash from an ATM. In Best cards for traveling to the Philippines you’ll find more information.
What to pack in your backpack
A key part of backpacking in the Philippines is preparing your backpack itself. The first thing we want to recommend is that you don’t pack too much. Forget the “just in case” items and travel light because:
- It’s hot in the Philippines and you’re going to spend a lot of time in swimwear.
- There are laundries everywhere that will wash your clothes overnight for 1–2€/kg.
- You can wash clothes by hand and they dry quickly.
- You’ll probably have to walk for a while with your backpack on, especially if you like to save on private transport such as tricycles or taxis.
- You’ll be able to find everything you need there. Cosmetics, clothes and more at good prices.
- If you plan to take several domestic flights, you’ll save a lot of money by not checking it in. The maximum weight allowed by almost all airlines is 7 kg. You can take an extra small handbag.
As essential items for a backpacker in the Philippines, we believe you’ll make a lot of use of a quick-dry towel, water shoes, a snorkel set, repellent, sunscreen, a small daypack, a lock for hostel lockers, a sleep mask, earplugs, and a dry bag.
In any case, we give you lots of tips in Backpack for the Philippines.

Useful phrases for backpacking in the Philippines
In the Philippines you won’t have any problem getting by with English and, in addition, many Tagalog and Bisaya words are similar to Spanish. Even so, they love it when you try to speak a bit of their language. These phrases can help you start a conversation:
- Kumusta ka? – How are you?
- Magandang umaga (Tagalog) / Maayong buntag (Bisaya) – Good morning
- Magandang hapon (Tagalog) / Maayong hapon (Bisaya) – Good afternoon
- Magandang gabi (Tagalog) / Maayong gabi (Bisaya) – Good evening
- Ang pangalan ko ay… –My name is…
- Magkano to? (Tagalog) / Pila? (Bisaya) – How much is it?
- Nasaan ang banyo? – Where is the bathroom?
- Para! – Stop! (this is very useful in jeepneys, as this is how you can indicate where to get off)
- Sabihin ang sa English? – Do you speak English?
- Hindi ko naiintindihan – I don’t understand
- Salamat – Thank you
- Walang plastic bag – Don’t give me a plastic bag
- Masarap! – Delicious!
- Ako ay Vegan/Vegetarian – I’m vegan/vegetarian
As for food, these words are also useful: baso (glass), mesa (table), tinidor (fork), kutsara (spoon), kutsilyo (knife) and plato (plate).
Being a responsible backpacker in the Philippines
Backpackers love to make the most of the trip and mix with the country, respecting culture and nature, which is why we believe it’s essential to be responsible.
The Philippines has exuberant nature that surely brought you here. Therefore, we ask you to respect it by following these guidelines:
- Don’t go to Oslob (Cebu) or Lila (Bohol) to swim with whale sharks, as it’s truly an aberration. There are places to swim with whale sharks in the Philippines responsibly.
- Don’t contribute to other activities with animals such as zoos or fake sanctuaries. This is especially important in Bohol.
- Remember that under the sea you only look—you don’t touch. Whether you’re snorkeling or diving, don’t touch anything, neither the corals nor the starfish. Taking the latter out of the water, even for a few seconds, kills them. Be careful and don’t step on corals and sponges.
- It’s also not OK to chase turtles or stick a selfie stick in their face. Keep about 3 meters away.
- Try to use biodegradable sunscreens or clothing with sun protection. This reduces the impact on marine flora and fauna.
- Try to minimize your consumption of single-use plastics. The Philippines has a serious waste-management problem.
- If you can, take 5 minutes to do a quick beach clean-up. It’s not your country, but you give nature a hand and set a good example for those around you.
- Forget about horse-drawn carriages. In some parts of the Philippines, such as Intramuros (Manila), they’re used to carry tourists. The horses are in very poor condition; don’t contribute.
- Research carefully which companies you book activities with. For example, in Bohol there are agencies that take you to do snorkeling in Balicasag and feed the fish, which is totally harmful to the marine ecosystem.
- Don’t take any shells or coral. This gesture has significant ecological consequences and, in addition, it’s prohibited.
But being a responsible backpacker also means respecting a country’s culture. Therefore, we ask you to take into account its traditions and “etiquette”. For example, in the Philippines going topless is prohibited, and, in fact, you’ll see that many women bathe quite clothed.
It’s also important to ask permission before taking photos of people. In the vast majority of cases they’ll say yes, but out of respect, we believe it’s the least you can do.
And please, don’t give money to or buy from children who sell on the beaches. It may seem like a minor gesture, but it can mean that child stops going to school because they earn more money for their family this way.
And although we all like to save, please don’t haggle too aggressively. In the Philippines, although not as much as in other countries, prices are negotiated—especially for tricycle rides—but it’s very much appreciated when it’s done politely and, of course, a good tip is valued if the service has been good.
We’re of the opinion that handing out bills can be very harmful (as it inflates prices and causes locals to be somewhat looked down upon), but trying to haggle to death to save 0,30€ isn’t ideal either. For them, it can mean a whole meal.

Tips for backpackers in the Philippines
We’ve given you tons of information, but we don’t want to stop sharing a few more of our own tips so you can enjoy it to the fullest:
-
- If your backpacking adventure in the Philippines is going to last less than 30 days, you won’t need a visa if you’re Spanish. If you’re going to stay longer or you’re from another Spanish‑speaking country, read Visa for the Philippines.
-
- Go to an international vaccination center with your vaccination card well in advance. In Vaccines for the Philippines you can learn more about this topic.
- It’s very useful to have a smartphone that lets you download these apps for traveling to the Philippines. We strongly recommend Maps.me and GRAB.
- Related to the above, getting a SIM card to have internet in the Philippines will help you a lot. You’ll be able to use the translator to interact more, send SMS to guides and hotels, check online maps if you get lost, use our website whenever you want and, of course, share great photos on your social networks.
- Try to always carry cash with you, especially if you’re going to less touristy places. ATMs often don’t work or run out of cash.
- Try to worry as little as possible about the weather. The Philippines has a tropical climate, so in the same day it can be sunny, pour down, or be cloudy. We do recommend checking the PAGASA satellite from time to time, which warns you if big tropical storms are coming with several days’ notice. This way you can adjust your route accordingly.
- Go with the flow and talk to people. Honestly, the best thing you’ll take from your backpacking trip to the Philippines are those moments with its people, who are lovely.
You’ll find thousands more recommendations for your backpacking trip to the Philippines scattered around our website, but we suggest starting with our Tips for traveling to the Philippines and Preparations for traveling to the Philippines.
Frequently asked questions about backpacking in the Philippines
We’ll wrap up by answering the most common questions backpackers have about the Philippines:
Is the Philippines a good place for backpackers?
Without a doubt, it’s one of the best destinations in Southeast Asia for traveling independently because of its prices, its climate, the variety of activities and destinations, and, among many other things, the number of travelers and local people you’ll meet.
How long would it take to backpack around the Philippines?
With more than 7.700 islands, you could spend a lifetime, but the best thing is to devote about 20 days to touring the country. If you have more or less time, no problem, you can always adapt your trip.
Which islands are best for backpacking in the Philippines?
In reality, you could go to any of them; it all depends on the type of trip you want to make. If you want destinations with a big backpacker vibe: Coron, El Nido, Port Barton, Siargao, Malapascua or Bohol will suit you.
On which islands can you meet people in the Philippines?
The destinations with the most social scene are usually Siargao, El Nido, Coron and Port Barton.
How much does it cost to backpack in the Philippines?
It depends a lot on your way of traveling, but you can estimate about 36-48€ per day for something in the middle.
Coron-El Nido Expedition
We hope this Backpackers’ Guide to the Philippines has helped clear up the doubts you had about your next adventure. If you have any questions, we’ll be happy to answer them in the comments. Enjoy it a lot!