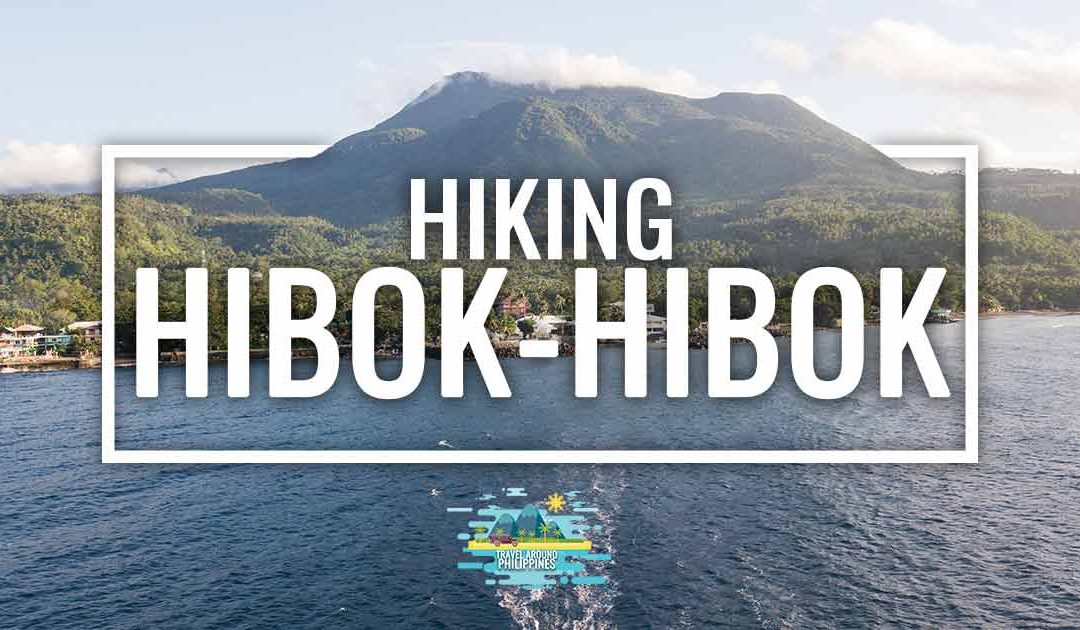
Beaches are the undisputed stars of any trip to the Philippines, but with more than 7,000 islands, you can imagine there are many more things to do. For example, if you’re passionate about hiking, Camiguin is a real gem. The island with the most volcanoes per square kilometer in the world, also called “the island born of fire,” has several routes that pass through its lush jungle forests to reach their summits. That’s why, for us, one of the essential things to do in Camiguin is the Hibok-Hibok trek, an active volcano whose summit sits at 1,332 meters above sea level.
Reaching its summit is a bit tough but wonderful. Not everyone can say they’ve conquered the top of a volcano, right? From there, on a clear day, you can not only enjoy 360º views of lush Camiguin and the nearby, paradisiacal White Island but also of Bohol to the north, Mindanao to the east, and Siquijor to the west. In addition, along the way you’ll enjoy the flora of Philippine forests, notably insectivorous plants.
If you want to know everything about the Hibok-Hibok trek, stick with us—we’ll tell you in detail.
Hibok-Hibok, an active volcano in Camiguin
More specifically, Hibok-Hibok is a stratovolcano belonging to the Pacific Ring of Fire and one of the most feared volcanoes in the Philippines. Also known as Mt. Catarman, it has erupted 5 times since records began, the last in 1951, when around 3,000 people died. As a curiosity, in 1951 about 69,000 people lived in Camiguin, but after that eruption so many emigrated that the population dropped to about 34,000.
The volcano has 3 craters: Kanangkaan (eruption in 1948), Itum (eruption in 1949), and Ilihan (eruption in 1951). The last of these, now a green lake surrounded by thick vegetation, is the one you can see during the Hibok-Hibok excursion.
Where is Hibok-Hibok?
Hibok-Hibok is located in the heart of Camiguin, an island belonging to the Mindanao region. It is one of the island’s 7 volcanoes along with Mt. Mambajao, Mt. Guinsiliban, Mt. Butay (or Uhay), Mt. Timpoong (the highest of all, at 1,614 meters high), Mt. Vulcan, and Mt. Tres Marías. Even so, these last 2 are considered parasitic cones of Hibok-Hibok.
Who can do the Hibok-Hibok trek? Our experience
If you’ve followed our travels, you’ll know we aren’t exactly mountain lovers. We love nature, but we’re not used to long hikes, so we can say without any doubt or shame that anyone with a “decent” fitness level can do the Hibok-Hibok trek.
We don’t exercise frequently. We spend the whole year traveling and don’t have any routine beyond what the trip gives us, so anyone who is moderately used to hiking will be able to conquer Hibok-Hibok’s summit without issues.
That said, we can’t say it’s a walk in the park. The Hibok-Hibok trek runs through a tropical forest with quite a bit of humidity, and your knees take a beating, since the trail is barely marked and rocky, and you have to keep grabbing branches. The descent is sometimes even a bit tougher, when your legs and strength start to fade. Plus, it’s normal to find quite a bit of mud and, yes, some leeches.
Different routes to ascend Hibok-Hibok
Although the summit is the same, there are several paths or trails to reach it. They’re all beautiful, but there are notable differences you should know when deciding which one to choose. Here we tell you all about the routes to climb Hibok-Hibok:
1. The Ardent Trail: from Ardent Hot Springs and back the same way
This is the one we did because our guide convinced us it was the shortest and fastest option.
It starts from Ardent Hot Springs and continues almost in a straight line until reaching the summit, which makes the climb steeper and means almost the entire way is pure rock. Plus, you pass through a humid forest, so you sweat a lot more and the path is narrower. After reaching the top, you need to walk a little under 10 minutes to get to the crater viewpoint. If you feel like it, you can go down to see it (about 30 minutes), but you’ll then have to climb back up.
Without a doubt, it’s the one with the fewest kilometers, but also the toughest and perhaps not as entertaining as the next one we’ll talk about, so, had we known, we would have done the Traverse.
2. The so‑called Traverse route or HO2: from barangay Yumbing to Ardent Hot Springs
This one starts from barangay Yumbing and follows an uphill route that’s a bit more moderate than the previous one. Then there’s a descent to pass by the lake (crater) and a small ascent to reach the first viewpoint and then the summit. You descend via the Ardent Trail to finish at Ardent Hot Springs.
It’s a slightly longer route, but also more diverse than the previous one, since you ascend on one side and descend on the other. The ascent via Yumbing is a bit wider and the path is not as rocky.
You can start this route like the previous one, early in the morning, but you can also split it in two. You can go up in the afternoon, camp by the lake, summit, and go down via the other trail.
2024 update: as of today, the YUMBING TRAIL is the only one enabled to climb Hibok Hibok. In any case, you can ask the guide.
3. The Itum Trail
Opened in mid‑2019, it starts from the so‑called Itum site, in barangay Baylao, but it’s not used much because, although shorter, it is tougher than the other 2.
Here you can see a screenshot from the Maps.me app, one of the apps we recommend for traveling in the Philippines, showing the first two trails marked.

The Hibok-Hibok trek step by step
On the day we did the Hibok-Hibok trek, luckily, the weather was spectacular. When we opened our eyes at 5:00 a.m., not a single cloud covered the summit, so it wasn’t hard to get out of bed—we had energy to spare!
After tidying up a bit and giving the backpack some final touches, we went to the hotel door and saw that our guide was already waiting for us, even a few minutes before 5:15, which was the time we’d agreed with him the day before. He encouraged us to hop on his motorbike, and we rode through a Camiguin that was slowly waking up.
After just under 10 minutes, we parked at Ardent Hot Springs and, to our surprise, he told us to walk along a small path (not signposted at all) that looked like the entrance to a house. That’s how it was—we crossed several family properties and soon ran into roosters, hens, pigs, horses, dogs, and carabaos to greet.

Before we knew it, the path began to climb, although the views of the mountains and the beautiful palm trees that characterize this part of the Hibok-Hibok trek distracted us. When the guide thought our legs were warmed up, about 20 minutes after starting, we made the first stop, from which we could already see views like these:

The path started to get a bit rocky and steeper, but we passed through a section full of shrubs with pink flowers and others with red berries that lifted our spirits. Little by little, the trail narrowed, and we realized we were crossing a pure tropical forest. Although it was still cool at that hour, we noticed the humidity increasing, as well as the sounds of the jungle.
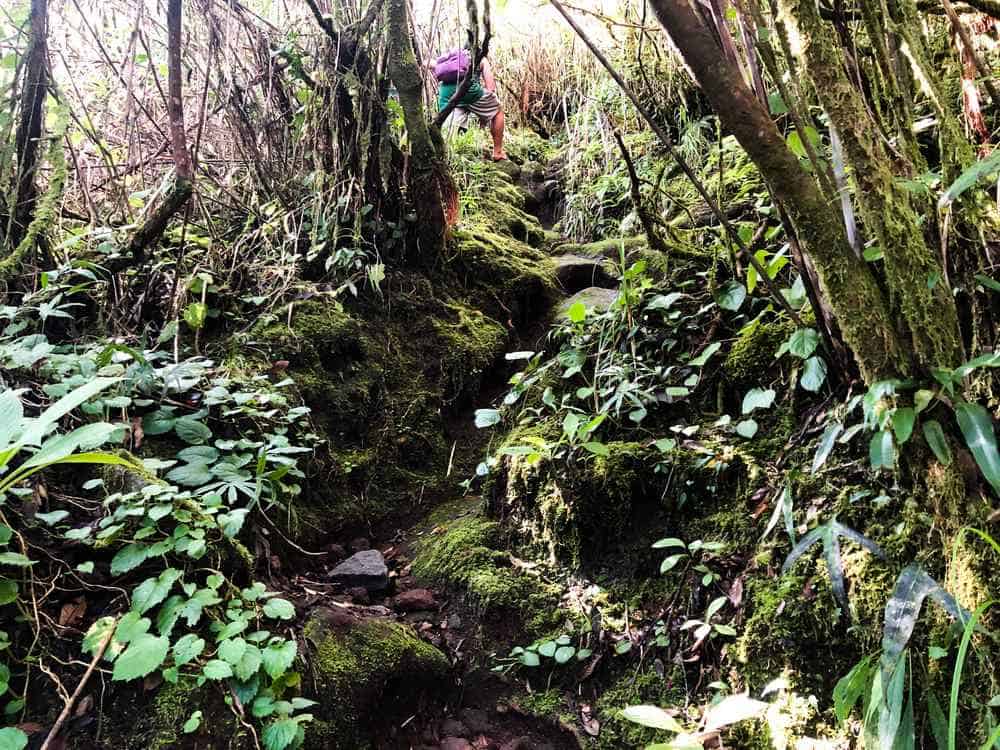
About an hour later, you reach a PhilVOLCS station, where they measure volcanic activity. We also stopped here for about 10 minutes to have a snack and recharge.
When we resumed, we realized that’s where it got hard and the path became narrower and steeper. It was time to start grabbing roots and take care not to slip. Even so, the desire to reach the top and the beautiful vegetation kept us going without issues. We started to see huge ferns, tons of moss, and pandanus—a kind of palm with huge roots—that captivated us. It felt like we were back in New Zealand.

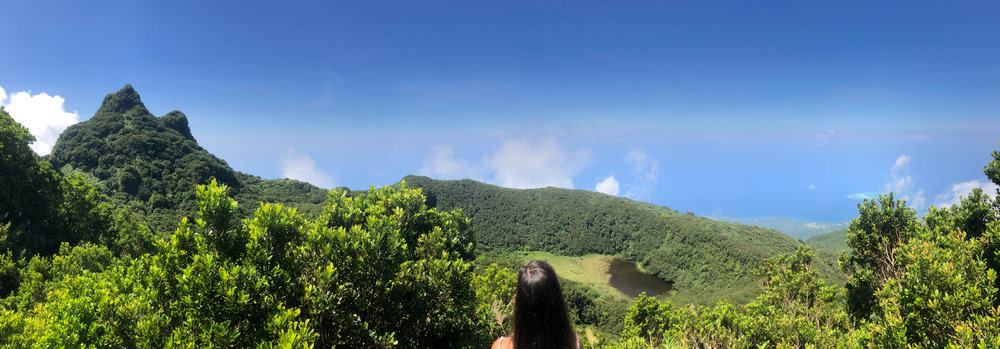
3,5 hours after starting the route, we reached the summit of Hibok-Hibok! As if nothing, we appeared in a tiny clearing from which you should see stunning views of Camiguin, White Island, and Mt. Timpoong, the highest on the island. However, it was cloudy! We were a bit discouraged, but after a 10‑minute break (and another peanut‑butter sandwich), it began to clear and we could calmly enjoy the whole panorama.


As a curiosity, half an hour after we’d been sitting there, 3 more tourists arrived like us (2 of them Spanish) who had done the Traverse route. Our guide started playing with one of the rats (yes, there are some field rats) lurking for food.
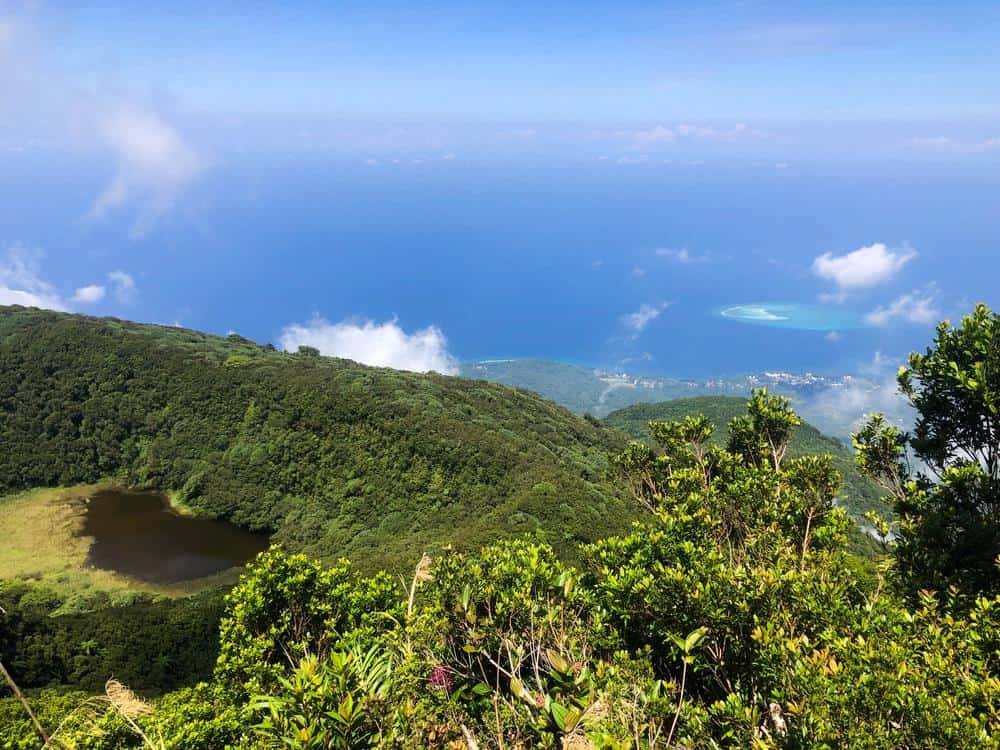
Our guide then suggested we continue to the crater viewpoint, and after about 10 minutes of easy walking, we reached what, for us, is the best view of the Hibok-Hibok trek. The needle‑shaped peaks of the mountain on the left, the vegetation‑ringed Ilihan crater in the center, and the view of White Island on the right had us smitten.
At that point we could have gone down to the lake, but that would have meant a bit more than 1 hour between the descent and the subsequent climb, so we decided to return to the summit and have another look, now that it had almost completely cleared.
When we felt satisfied (and seeing the heat was rising), we began the descent the same way we’d gone up. We noticed our legs starting to shake and our strength waning, so we made a couple of stops when needed. We have to admit the descent felt quite a bit more monotonous than the ascent. We did it in about 2,5 hours without rushing.

Exhausted, we reached the Ardent Hot Springs parking lot around 13:00, a little more than 8 hours after starting the trek. Our guide told us the usual time for the ascent is about 3–4 hours and that, depending on how long you spend at the summit and the other viewpoint, you’re usually back for lunch. So, as you can see, our Hibok-Hibok excursion in Camiguin was more or less average.
If you want, when you arrive you can treat yourself to a well‑deserved warm dip in the Ardent Hot Springs pools and then head back to your hotel on your own. You’ve earned it! We decided to go straight “home,” and a good way to stretch our legs—after a good shower and meal—was to snorkel at Sunken Cementery and watch the sunset there to close another magical day in Camiguin.
By the way, you can see the Instagram stories of our climb at this link.

How to organize the Hibok-Hibok excursion, Camiguin
As we mentioned, to make the ascent to Hibok-Hibok you need to obtain a DENR permit (Department of Environment and Natural Resources) and go with a guide. To do so, you have several alternatives:
- Go to the DENR office in Mambajao and request the permit there. They can help by giving you a guide’s contact. They usually assign them by shifts.
- Go to the Camiguin tourism office and ask for help. Don’t expect them to be very efficient, though.
- Ask at your own accommodation, where they usually have a contact.
Of course, you’ll always have to do it at least the day before. If possible, try to arrange it before 16:00.
The price of the permit is 500 pesos per person. Guides charge 1,500, although it depends on how many of you there are. We paid 1,500 pesos for 2 people.
Which guide to climb Hibok-Hibok with? We can’t recommend our guide in particular because several travelers who went with him later told us he didn’t provide good service. However, other travelers have given us contacts for better ones, so if you leave us a comment, we can send you the info.
What to bring for the Hibok-Hibok trek
- Plenty of water: no less than 2 liters and preferably 3. You won’t find stalls to buy along the way. If you forgot to buy the day before, don’t worry—tell the guide and he’ll stop at a sari‑sari so you can buy (yes, they were open at 5:00).
- Some snacks and sandwiches. We brought cookies, peanut‑butter sandwiches, and nuts.
- Sunscreen and repellent for insects.
- Good hiking shoes. Although the guides even do the Hibok-Hibok trek in flip‑flops, the path is slippery even if it hasn’t rained in the previous days.
- Cotton clothing or something breathable. We did the ascent in long pants; there wasn’t that much undergrowth, but we still didn’t get any scratches. Our guide advised a long‑sleeved shirt, but we never needed it.
- Cap or hat to protect you from the sun.
- Rain jacket (you never know) and a rain cover for your backpack.

Tips for the Hibok-Hibok excursion
- The first and main one: don’t do it without a guide or without a DENR permit. It’s not only illegal but also dangerous. We repeat: Hibok-Hibok is an active volcano. PhilVOLCS, the Philippine volcanology agency, issues advisories about activity and, therefore, conditions can arise that prohibit the ascent.
- Don’t stress—you have plenty of time to do the trail, and guides are used to every type of person. Even so, it’s advisable to start early (not much later than 5:30) to avoid the hottest hours.
- If you can choose the season, the best time to do the Hibok-Hibok trek is usually from March to May, when it’s the dry season and you’re less likely to have clouds covering the view. We still did it in November and, as you can see, the weather was spectacular.
- Stay hydrated.
- If the weather changes a lot or is bad from the start, abort the mission. Keep in mind the path is very slippery and quickly turns into a mud pit. Plus, you’ll likely see nothing from the summit. Follow the guide’s lead.
- Don’t go super loaded with your backpack. Consider that you’ll need a lot of water—that should be the main thing you carry.
- Stretch your legs a bit when you get back to the hotel if you don’t want crippling soreness (like we had).
- Please travel with a good travel insurance for the Philippines like the one we always use. Keep in mind hiking is considered an adventure sport, so you’ll need to take out the IATI Estrella or IATI Mochilero plan, or add the adventure sports coverage to the Basic or Standard. Here you have a 5% discount for coming from us and, in addition, you help us keep creating content for this website.

Other places to go hiking in Camiguin
Hibok-Hibok isn’t the only spot for hiking in Camiguin. Here are more options:
Walkway to the Old Volcano
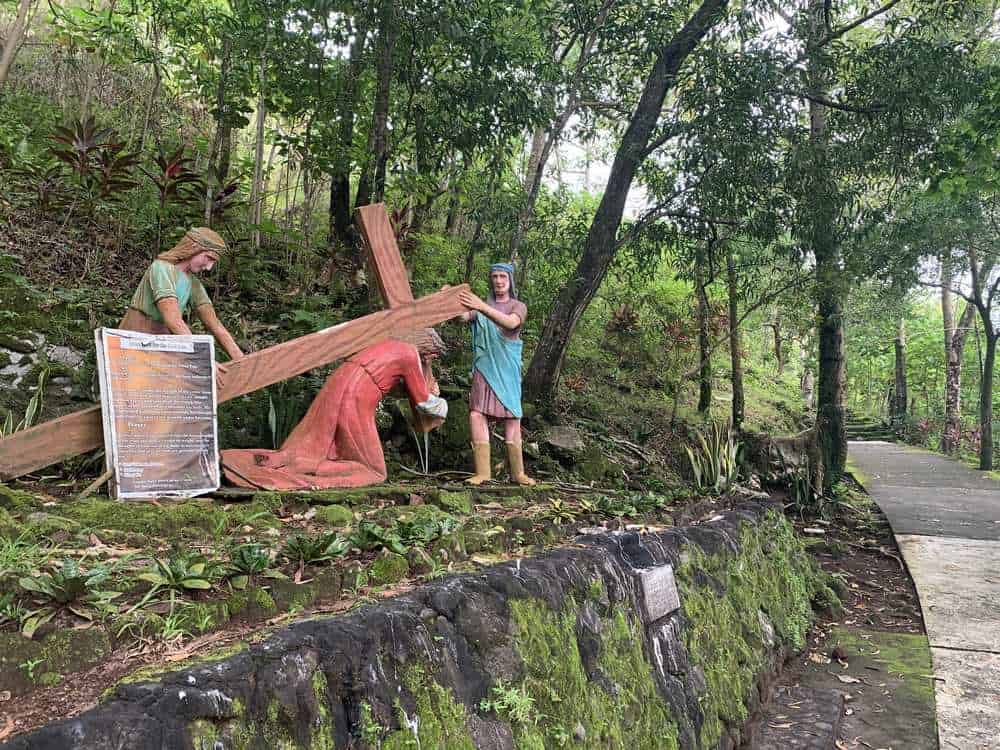
Although it doesn’t reach the difficulty or “epicness” of Hibok-Hibok’s summit, another interesting hike you can do in Camiguin—and one that makes it an ideal island for hiking lovers—is the Walkway to the Old Volcano. This is a trail along the slopes of Mt. Vulcan, the youngest volcano on the island, born from a fissure of Hibok-Hibok in 1871. The summit is at 671 meters, but the Walkway trail (fully paved with some gravel sections) only takes you to one of the viewpoints.
The views from the viewpoint are gorgeous. You can see the cross of Sunken Cementery, White Island, and, of course, Camiguin’s impressive orography. Along the route there are 14 scenes from the life of Jesus Christ represented with sculptures. It’s a memorial to the victims of the volcano’s last eruption.
The trail is completely uphill and with stairs. If you’re in average shape, it won’t take you more than 30 minutes. The path is more or less covered, but even so, don’t forget sunscreen and a bottle of water.
Entrance costs only 10 pesos per person.
If you’re left wanting more, from the Hotel Kurma they organize ascents up to the summit of Mt. Vulcan.
Binangawan Falls
The “hidden” waterfalls, or Binangawan Falls, also involve some hiking, which is why we include them in this article on trekking in Camiguin. Although it’s relatively easy to get to the point where the path begins (you can go by motorbike, but be very careful braking on the way down), you’ll then have to hike through the jungle for a little over an hour. Even so, it’s worth it. You’ll very likely have the waterfalls to yourself.
Note: if it has rained a lot in previous days or it’s going to rain, for safety, try not to do this trail, as there have been some accidents. In addition, many people tend to get lost because the path isn’t very well marked. It’s advisable to hire a guide.
Other, lesser‑known ones
Our guide told us there are lots of different routes around Camiguin.
Recommended accommodations in Camiguin
We recommend staying in the Yumbing area, since all the routes start or end nearby.
- Mountain View Cottages: this is where our Hibok-Hibok adventure began. These are lovely bungalows run by a Canadian‑Filipino couple with mountain views. The cabins are super spacious and even have a fully equipped kitchen, which is great for making breakfast or a Spanish omelet if you miss home. We even dedicated a full article to it: Staying at Mountain View Cottages, Camiguin. Availability and prices by clicking here.
- Pabua’s Cottages: good‑value accommodation in the heart of Yumbing. It’s not super amazing, but it’s very good. Availability and prices by clicking here.
Want more options? Check our article Where to stay in Camiguin.
Booking.com
Camiguin Guide
Surely you’re coming to the island because many more things about it have drawn you in, right? Find everything you need to know in our Camiguin Guide.
If you have any questions or suggestions, we’ll be happy to read you in the comments!